How to Make Perfect Sourdough Bread at Home: A Beginner's Complete Guide

This guide walks through every step of baking sourdough bread at home — from building a starter to pulling a golden loaf from the oven. No fancy equipment needed. Just flour, water, salt, and patience. You'll learn the timing, the techniques, and the small details that separate dense, gummy bread from the airy, tangy loaf you're after.
What Do You Need to Start Baking Sourdough?
You need four ingredients: flour, water, salt, and a sourdough starter. That's it. The equipment list is equally short — a mixing bowl, a kitchen scale (the Escali Primo works well), a Dutch oven or combo cooker, and a bench scraper.
Don't overthink the flour. Many beginners get stuck researching artisan wheat varieties. King Arthur Bread Flour (available at most grocery stores) produces excellent results. Once you're comfortable, experiment with whole wheat or rye additions.
Here's what the setup looks like:
| Item | Purpose | Budget Option | Upgrade Pick |
|---|---|---|---|
| Kitchen Scale | Accurate measurements | Escali Primo ($25) | OXO Good Grips ($56) |
| Dutch Oven | Traps steam for crust | Lodge Cast Iron ($60) | Staub Cocotte ($350) |
| Proofing Basket | Shapes the loaf | DIY bowl + towel | San Francisco Baking Institute banneton ($28) |
| Lame | Scores dough cleanly | Razor blade on chopstick | Wire Monkey Arc ($32) |
Worth noting: you can make excellent bread with the budget column. The upgrade picks add convenience — not necessarily better bread.
How Do You Make a Sourdough Starter from Scratch?
Mix 50 grams whole wheat flour with 50 grams warm water in a jar. Stir until no dry flour remains. Leave it uncovered (or loosely covered with a cloth) at room temperature for 24 hours.
That's day one. The process — called feeding — continues for about 7 to 10 days. Each day, discard half the mixture and add fresh flour and water (50g each). The catch? You'll see nothing happen for the first few days. This is normal. Wild yeast and bacteria are colonizing the mixture, just not visibly yet.
Around day three or four, bubbles appear. The smell shifts from floury to tangy — almost vinegary. By day seven, the starter should double in size within 4 to 6 hours of feeding. That's when it's ready to bake with.
Here's the feeding schedule that works:
- Day 1: Mix 50g whole wheat flour + 50g water. Rest 24 hours.
- Days 2-6: Discard all but 50g of starter. Add 50g flour + 50g water. Stir. Rest 24 hours.
- Day 7+: Once the starter doubles consistently, switch to twice-daily feedings if baking soon — or refrigerate and feed weekly for maintenance.
The float test helps confirm readiness. Drop a spoonful of starter in water. If it floats, there's enough gas (yeast activity) to leaven bread. If it sinks, wait another feeding cycle.
What's the Basic Sourdough Process?
Mix flour and water first — this is called autolyse. Let it rest 30 minutes to 2 hours. Then add the starter and salt, knead briefly, and begin the bulk fermentation (the main rise).
The timeline looks like this for a simple loaf:
- Autolyse: 1 hour
- Mix and knead: 10 minutes
- Bulk fermentation: 4 to 6 hours (with stretch-and-folds every 30 minutes)
- Pre-shape and bench rest: 30 minutes
- Final shape: 5 minutes
- Cold proof: 8 to 24 hours in the refrigerator
- Bake: 45 to 50 minutes
The stretch-and-fold technique builds structure without aggressive kneading. Wet your hand, grab one side of the dough, stretch it up, and fold it over the center. Rotate the bowl 90 degrees. Repeat four times. Do this every 30 minutes during bulk fermentation — usually 3 to 4 sets total.
Here's the thing about timing: sourdough doesn't use commercial yeast. The rise depends on temperature, starter strength, and flour type. A kitchen at 75°F (24°C) moves faster than one at 65°F (18°C). Watch the dough, not the clock. The dough should look puffy, feel airy, and show visible bubbles when you cut into it.
How Do You Know When the Dough is Ready to Bake?
The dough passes the "poke test." Press a floured finger into the surface. If it springs back immediately, it needs more time. If it springs back slowly and leaves a small indentation, it's ready. If it stays depressed, it's overproofed (bake it anyway — it'll still taste good, just flatter).
Cold proofing — letting the shaped loaf rest in the refrigerator overnight — improves flavor and makes scoring easier. The cold firms up the dough. You'll get cleaner cuts and better oven spring (that dramatic rise when bread hits hot heat).
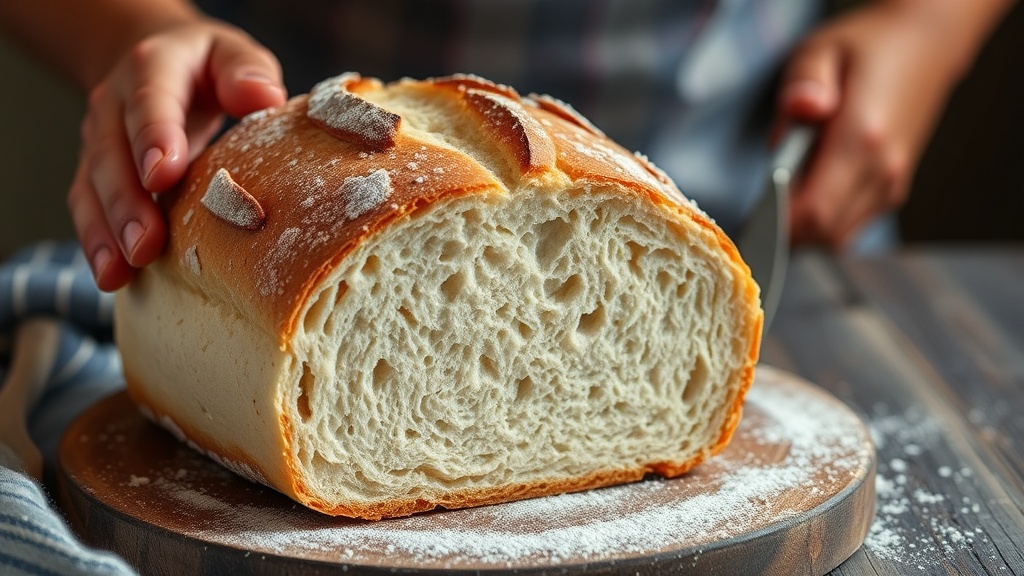
Scoring isn't just decorative. A single deep slash (about ½ inch) with a lame or sharp razor controls where the bread expands. Without a score, bread tears randomly — often on the side, which ruins the shape. The King Arthur sourdough method recommends one confident slash at a 45-degree angle.
What's the Best Way to Bake Sourdough?
Preheat the Dutch oven at 450°F (232°C) for at least 30 minutes. The pot needs to be scorching. Drop the cold dough onto parchment paper, score it, then lower it into the hot pot.
Bake with the lid on for 20 minutes. This traps steam — it keeps the crust soft so the bread can expand. Then remove the lid and bake 20 to 25 minutes more. The crust should turn deep golden brown. You're looking for an internal temperature of 205°F to 210°F (96°C to 99°C).
That said, don't slice immediately. The bread is still cooking inside. Let it cool on a wire rack for at least one hour — two is better. Cutting too early yields a gummy crumb.
Why Did Your Sourdough Fail?
Dense bread usually means underfermentation. The dough didn't rise long enough. Flat, spread-out loaves often indicate overproofing or weak shaping. A pale crust suggests the oven wasn't hot enough — or the Dutch oven didn't preheat fully.
Gummy texture? The bread needed more baking time or longer cooling. Sourdough holds moisture differently than commercial yeast bread. A digital thermometer removes the guesswork.
Blistered, rubbery crust happens from too much steam. Some home bakers (chasing those Instagram-worthy ears) spray extra water into the pot. Don't. The dough's natural moisture plus the covered bake provides plenty.
Common Problems and Fixes
Problem: Starter never doubles.
Fix: Check water quality — chlorinated tap water kills yeast. Use filtered or dechlorinated water. Also verify temperature; starters prefer 70°F to 80°F.
Problem: Dough tears during stretch-and-folds.
Fix: Wet your hands. The dough won't stick to water. If it's still tearing, you may have added too much flour during mixing.
Problem: Bread sticks to the banneton.
Fix: Rice flour is the secret. Regular flour absorbs moisture and creates glue. Rice flour stays dry and releases cleanly.
How Do You Store Sourdough Bread?
Wrap the cut side (not the whole loaf) in a clean kitchen towel. Store it cut-side down on a cutting board. The crust stays crisp, the crumb stays moist. For longer storage — beyond 3 days — slice and freeze in a freezer bag. Toast slices directly from frozen.
Never refrigerate sourdough. The fridge accelerates staling through a process called retrogradation. Counter or freezer. Nothing in between.
"Sourdough is simple. Flour, water, salt, time. The complexity comes from understanding those four elements — not from adding more."
The journey from first starter to consistent loaves takes about a month. Your first few attempts might be flat, or sour, or strangely shaped. Bake anyway. Each loaf teaches something — how the dough feels when properly fermented, how your kitchen's temperature affects timing, how your oven bakes.
Eventually, you'll stop measuring everything. You'll know by touch when the dough is right. You'll adjust hydration based on the weather. That's when sourdough becomes truly yours — not a recipe followed, but a rhythm learned.
For deeper technique guidance, The Perfect Loaf offers detailed explanations of fermentation science and scoring patterns. The San Francisco Baking Institute also provides professional-level resources adapted for home bakers.
Start tonight. Mix flour and water. By next weekend, you'll have bread that came from your hands, your kitchen, your patience. That's the thing about sourdough — it asks for time, but it gives back something no grocery store can sell.
Steps
- 1
Create and Feed Your Sourdough Starter
- 2
Mix and Autolyse the Dough
- 3
Bulk Ferment and Shape the Loaf